When I talk about photography people always thinks about a digital camera, point and shoot cameras. But not many of the people knows different techniques and qualities. We all grew up in a digital era and we use digital cameras in daily basis, and we don't even recognise how flat and boring photography had became. In the early centuries of photography it wasn't so easy to make an image of someone. If we go back in history to around the 1870s, we will find photography more difficult to use. And that is what I really like about historical processes such as wet plate collodion, the intimacy and the fact that people don't even recognise these techniques.
So the origin of wet plate collodion goes back until the 1850s when the new technique has replaced the first photographic process called Daguerrotype. In the process we using collodion what has to be poured on a plate or glass, and handle it in a dark environment.
Bare in mind we using highly harmful and deadly chemicals!!! It is very important to know some health and safety issues. Because we work with glass and thin aluminium, these are sharp things and you can easily injure yourself. Collodion and Diethyl ether are colourless liquids and highly flammable. Cadmium bromide is extremely hazardous. It is a solid white to yellow crystalline. Acetic acid is a colourless liquid at room temp and it is dangerously corrosive. Ammonium iodide, white crystalline powder used in developer.
Recipe for collodion:
Ethyl alcohol 95-100%
Ethyl Ether
Cadmium Iodide
Cadmium Bromide
Nitrocellulose
Sulfuric acid
Silver Nitrate
Ferrous Nitrate
Dissolve the two above with 4 drops of water:
collodion: 118 ml
Ethyl Ether: 77ml
Ethyl Alcohol: 77ml
After we have been introduced to the chemicals, and the health and safety issues our "historical process" session has began.
Wet plate
Preparation:
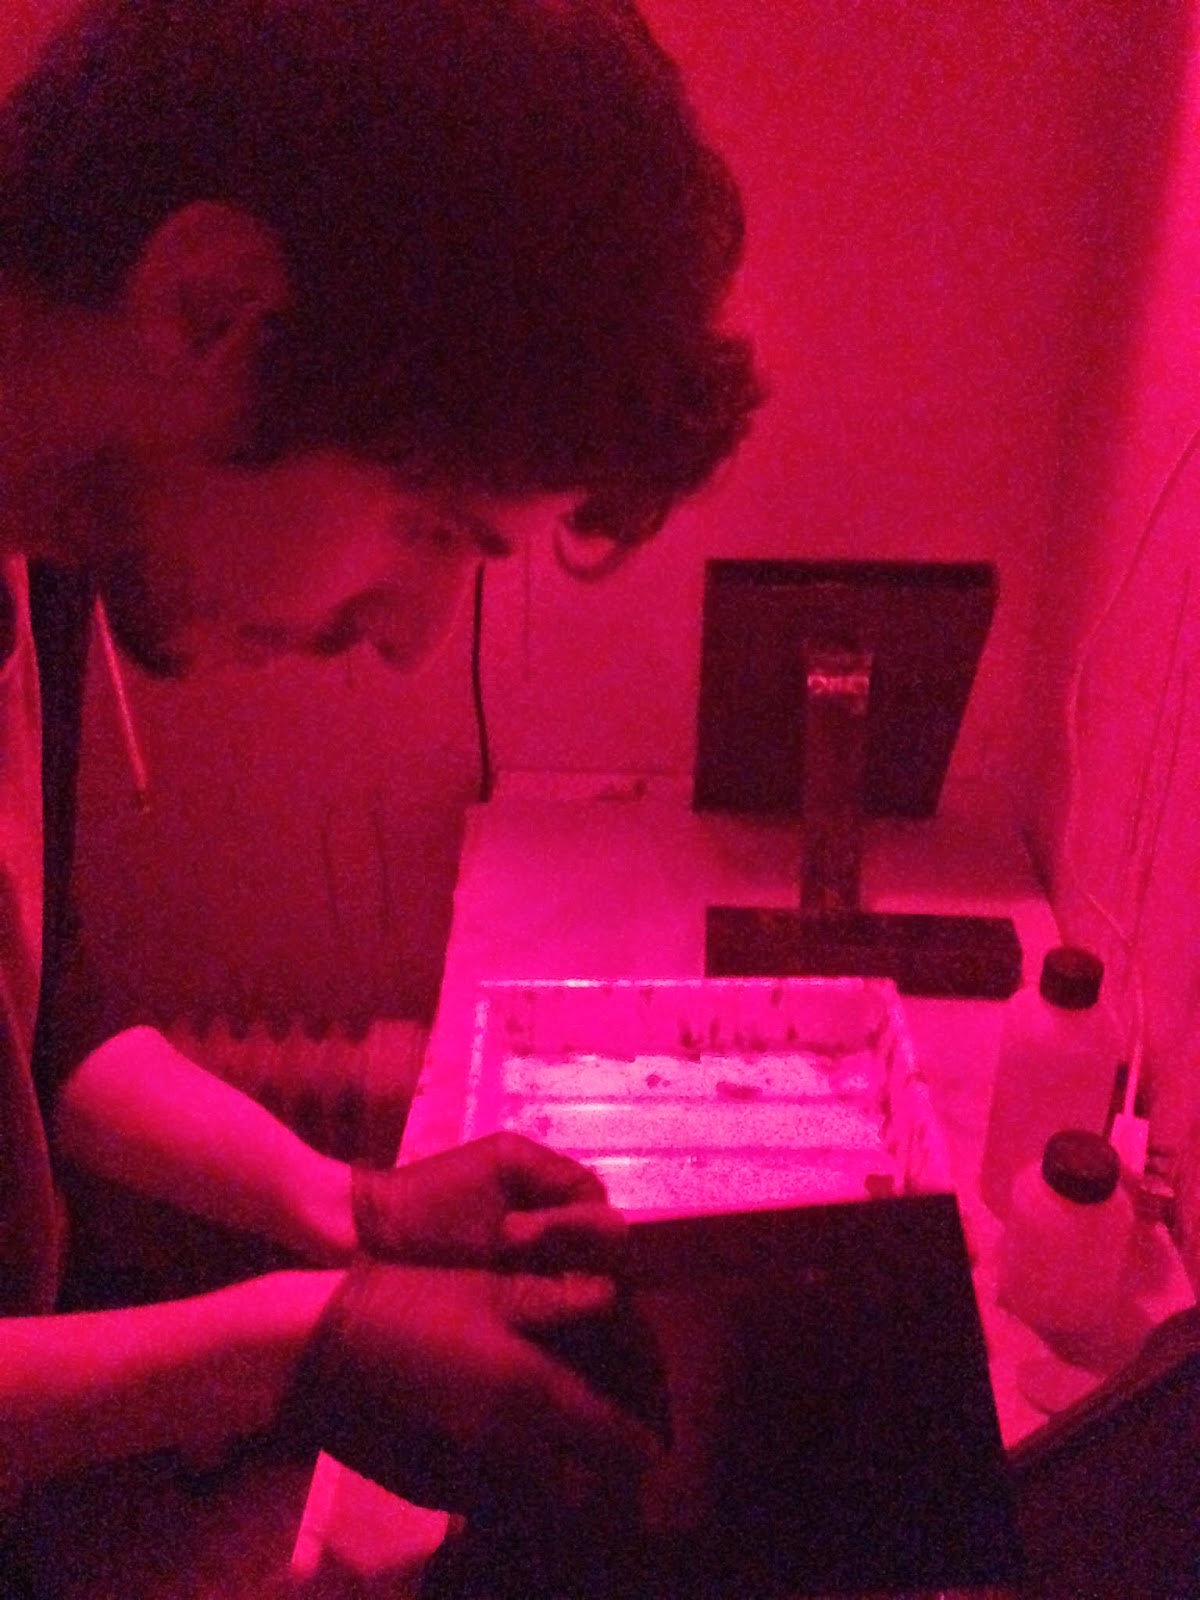
If we using glass plate first we have to polish the surface to dissolve any grease and fingerprints to make sure the collodion will perfectly distributed on the plate. We used egg white to coat the edges of the plate this will help the collodion to stay on on the edges. After the plate has been polished and the egg white been applied on the edges, the collodion has to be treated in silver nitrate to make it photo sensitive. I have put the plate in the silver nitrate tank for 3 minutes. After this stage the process needs to be done in darkness, only the safe lights can be on. After 3 minutes our plate is ready to be taken out of the silver nitrate tank and to be placed in the film holder. We used half plate, so the size is smaller than 4x5". Now I have a loaded film holder and a light sensitive glass plate.
On the camera I've set up the distance, framing and the focus. The camera has to be focused on the eye because it is a portraiture and the dept of field is so shallow, anything outside of the focus plane will be blurred out. We set the lens for the widest aperture.
Taking the shot
After everything is done I just have to take the picture. I take the lens cap off release the flash and put the lens cap on. After all this, make sure the darkslide is back in its place, and head back to the darkroom.
Developing and fixing
Open the film holder in complete darkness and then pour developer on the plate, leave it on for about 20 seconds meanwhile tilting the image to let the developer cover the whole image, and rinse the image. IMPORTANT to rinse the developed image with water if we use potassium cyanide. The acid releases gases from the cyanide and it is deadly. We all have to handle the chemicals with respect. The fixing procedure takes a couple of minutes. Usually it takes until the image clears and the milky Iodides wash off.
Wash the plate and leave it in the drier for a couple of minutes.
Here are the final images:
First attempt in wet plate collodion photography, the quality is satisfying for me, but keep on trying for a better result. I am fascinated by the resolution of the pictures, every little detail can be seen on the skin thanks for the UV light and the emulsion. The collodion exposes for the UV light which gets under the models skin.
To produce a digital negative image for our upcoming Cyanotype event, I have picked a colour picture which I shot in Blackpool last summer.
First I opened is photoshop and duplicated the layer.
We need a contrasty black and white image so I turned the photograph into black and white by using the gradient map. The reason why we used this option is to keep the RGB and don't distort the colours by using the black and white option.
Then I changed the levels to make the image more saturated.
So now I have a contrasty black and white image, for printing it to a transparency film. But first I still have to adjust a few things.
To sharpen the image I used the High Pass option from the Filter -> Other menu. By using this we can lose detail so be careful with this filter.
I have changed the screen mode to overlay. So the background copy and the high pass filter now overlay.
I have to flatten the image than paint it blue with the paint bucket tool. Hot key "G". But first mix the colour for the cyanotype blue. We can do it via our colour panel. Double click on it and add Red 47 Green 161 and Blue 219.
And use the screen mode and set it to overlay again. So the coloured image will look like this.
To create a photo book. The basic idea behind the making of a good photo book is a sequence or series of photographs, what somehow share the same idea or similar inspiration. Like a portfolio, a good photo book should be consist of powerful images, but also there should be some "not so" powerful images to connect them together. The whole idea of a photo book is to tell a story, and create the feeling we are "reading" the pictures, like how we do it with a book. My photo book is not documentary style or story telling, but the images how I planned, share the same concept and inspired the same photographer.
One of my new photography projects is about composition. A simple black and white work, mainly inspired by Andre Kertesz. Photographing simple scenarios, street scenes or object what always in our sights but we don't really notice them. Placing them in a good composition to make it more exciting. Mainly using black and white because that's the way I see most of the times. So my first photo book would be about a selection of images, using space, compositions and blur.
My inspiration
Andre Kertesz (2.07.1984-28.09.1985) was a Hungarian-born photographer known for his groundbreaking contributions. In the early years of his career, his then-unorthodox camera angles and style prevented his work from gaining wider acknowledgment. Today he is considered one of the seminal figures of photojournalism. He started photographing in 1912, mainly people and the surrounding Hungarian plains. In the first world war he was photographing in the trenches, but most of his photographs were destroyed. Later he emigrated to France where he met other great photographers such as Henri-Cartier, Robert Capa, Man Ray, Brassai.
Kertesz's work is notable from his play with the shadows and distortions. Using a compact camera, rather than a large format, he was able to capture unique moments, like this. He was able to play with empty, creating more than exciting images.
Andre Kertesz is one of the biggest inspirations for this project. I was always fascinated how he was able to create some exciting images in a not so exciting everyday life's moment. One of the first photographs I've seen from Kertesz is called Meudon. I always train my skills to be able to compose something exciting like this image from him.
Without the elements, such as the moving train from right to left and the person in the middle who also walks left to right holding a frame, it would be just a simple picture. The funny thing is about Kertesz's work that is in his time -20s when this frame shot- the composition what he used was ground breaking and controversial.
Kertesz loved the play between pattern and deep space, the picture plane of his photographs is like a visual trampoline, taunt and hardy.
Another example for this original quality of formal invention, there is in the work of Kertesz another quality less easily analyzed, but surely no less important. It is a sense of the sweetness of life.
After I did some research and had a look at some of his works, I decided to create similar images. Using different equipment sometimes I used my iPhone because of its compact size, and also used film.
Andre Kertesz, Peter Adam (1985). Kertesz on Kertesz: A Self-Portrait. New York: Abbeville Press. 120.
Eric Kim. (2013, Sept 16). 10 Lessons Andre Kertesz has taught me.Available: http://erickimphotography.com/blog/2013/09/16/10-lessons-andre-kertesz-has-taught-me-about-street-photography/. Last accessed 20th March 2014.
My work
When I took this picture I was on my way home and cut my way through a car park and saw this odd object, in a parking slot. It was a little bit weird situation, what a shopping trolley would have been doing there. I saw a picture, a big negative space with an odd character the trolley and the brollie, but I also seen it in black and white. I had to convert the image to black and white, dodged and burnt a little bit over the asphalt and the little pond, because it was too bright.
This image has been taken during the time I was waiting for a tram to get to work. I saw a lot of people rushing to catch the train I took a couple of frames with my film camera using an xp2 film which is a c-41 black and white film. But I was using a not so slow shutter speed, I was thinking I will not be able to show the crowd and the movement on the pictures. I changed it to a slower shutter speed. Because of the image only existed in my head, I couldn't check it on the screen so I hoped for the best. At the end I would be able to catch what I was hoping for, I planned the lines will be able to lead the eyes towards the crowd and the slow shutter speed will bring some speed, energy to the image. But because it is a chromogenic film, the prints were a bit greenish toned. I have converted to black and white after I've scanned the negatives and brought out the blacks a little bit and the highlights.
The girl behind the shower screen. I wanted to create a moody vision, using the drops on the screen, the steam, what covers the body behind it, gives a mysterious feeling to the image. The model not being posed it was just a snapshot using my digital camera and in the post editing I just adjusted the black and whites, the levels and curves.
On this image I captured another vision of mine. The pedestrians way which creates a path from the darker area to the more lit area, creates a depressing feeling, similar to the days when it is raining in Manchester. I took this image with my iPhone using the hipstamatic application, which uses a square format.
I used the bicycle to fill the frame, to add more vertical lines to my composition. I burnt the pedestrian way to look not so bright.
My iPhone is my gear again on this picture. The composition caught my eye, the lines and the doorway, also the two persons who are sitting under the cover of the gate. One of them moments what if I wouldn't have caught I would feel sorry about it for a long time.
So these would be my pictures for my first photo book. Let's do some research on the companies.
Research
I've been given a few tips what photo book companies I should have a look at first.
I had a look at dscolour labs' photo book editing site first, which would be a practical choice because it is close where I go to college so I could pick up the book in days. The range they offer looks all right but not so quality like what blurb offers.
Of this range I would have picked the Luxury Range. That looks good for me and the pricing is decent as well.
Here we can see the pricing.
But because this range only just arrived, it is still not available so I have to look for another solution.
Sadly I didn't find any reviews about their service, and seen their range I've decided not to go with their choice.
The ASDA supermarket offered possibilities aren't bad so I decided to have a look at their range as well. ASDA's range first looked quiet cheap-o so I decided not to carry on. The A3 sized photo book with hard cover priced for £55 what is not so bad for the quality.
The only problem is with ASDA photo book service is the poor rating on www.reviewcentre.com Only rated for 2.3 of 5.
For my black and white work I've planned a similar looking book for the finished work. But to not to decide to quick, let's have a look at Blurb.com
Blurb. This company is well known around the world, and very experienced in photo book making so firstly I would go for this one. It is a USA based company, and their costumer service is second to none. I have watched a couple of videos from Daniel Milnor who is a documentary photographer and works for Blurb Inc.
For self publishing your work it is the easiest way to get in and create something different. The range what Blurb offers is quite good, and the quality of the books look better than the other two companies offered. Pricing is similar, it only costs a couple of pounds more if I order it from Blurb. The book I selected is a large 13x11in landscape format one.
Here we can see the selected item. So I decided to carry on with the Blurb photo book.
The rating of the Blurb services is quite good overall, so I decided to choose their services for my first ever made photo book. Here is the review what I've found.
The making of the photo book
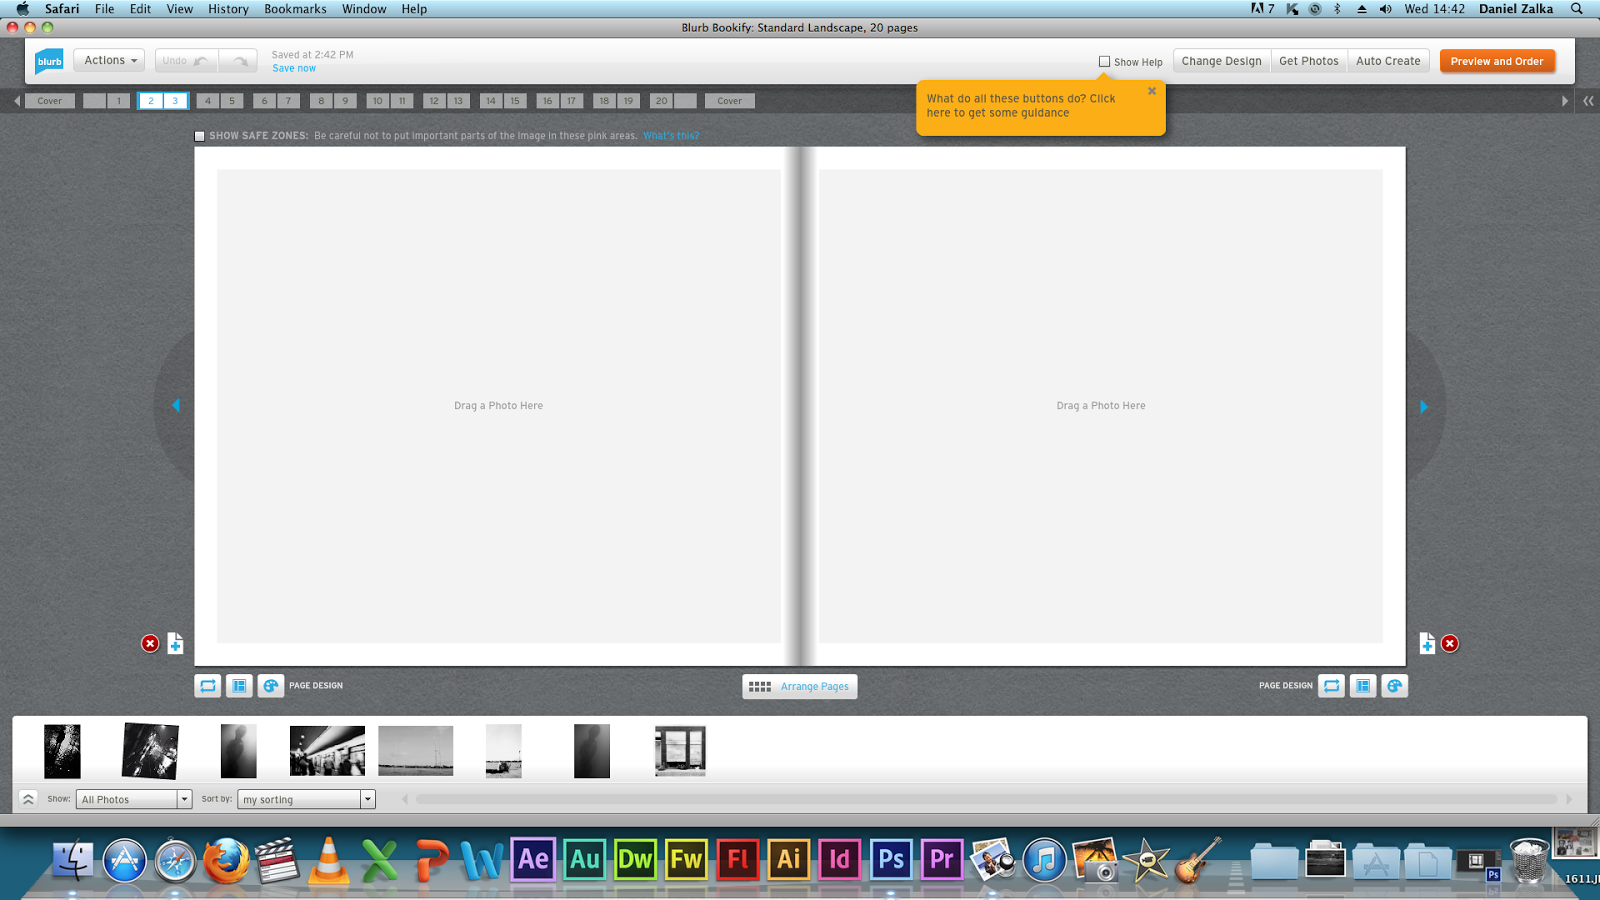
To make our photo book on blurb we've got to open our account. If we haven't got one, we will have to register quickly with them. I have signed in to my account and started it, with their on-line program called bookify.
You can use light room or indesign
I chose the large landscape format
Classic white background for the black and white prints
So I have edited the photos for blurb printing. So I decided to go with the 20x25cm landscape photo book. Photos being edited for 300ppi and 20cm height or 25cm width.
Using Bookify
Using the on-line program to create the Blurb book is just simple. It is so easy to see through and organise your photos, with a few pictures like mine it took me about half an hour to make it, including the image editing time.
Here are some screenshots about the procedure.
Started with the layout. Easy to see through
Starting with a simple image.
A stronger image no captions just plain photography
Easy to see through layout.
Digital magazine
We have also discovered an easy way of self publishing, through a digital magazine called issuu. By registering and creating your own pages, we can also publish our work, and follow others. This is the easisest way of self-publishing.
First is to create a .pdf file or a .doc file to be able to upload the ready works. Here I just opened word and I have inserted all my photos.
After all this I just have to upload everything to Issuu, using their own program which we can find on the website itself.
It will take a few minutes to convert it.
We can edit a little bit, adding a title and the page layout etc...
Now I can publish our final work, my first issuu magazine.
Conclusion
In the beginning of this project I thought it is not going to be easy, and I was right. To choose my own pictures to create my own photo book, is something unique feeling what worth the struggle. It is very important to do a decent research on photo books because nobody wants to order a bad quality book for this much money. Books always been important for me, I own a lot of books. I appreciate them more than internet browsers. Easier to find everything just to type in google, but a book is physical and limited. That's the magic of a book I think. I will create more photo books if my time will let me do more projects.
The first photographer whose photograph I would like to have a look at is William Klein's image what he photographed in 1955 in Harlem, New York.
In Klein's work I always see dynamic and a lots of movement, he uses blur to add more intensity to it. The direction of the guy in focus is left to right while the other person is walking the opposite way. The two persons differ in a few ways but also similar to each other. One is young or at least younger then the other, and I think the man on the left is also a dad or the child could be his daughter as well and he just arrived to them. The younger guy who is in movement, looks energetic, happy and also happy to be photographer meanwhile the other person is slowing down a bit as he looks a bit more relaxed and older maybe wiser. What I'm trying to say what I see there is the difference between the ages it could be just a couple of years but it appears for me on this picture. They both wearing suit one is wearing dark one is wearing a darker one. I also think about the vertical line between the two person it could referee to be a mirror between the young energetic and the older, wiser family man. They both enjoying a pepsi that is a similarity between them so that's why I thought about my mirror idea.
The photograph is from Robert Frank's The Americans book, which has been published in 1958. The book is about the post-war American life, how the photographer who was born in Switzerland seen it. He saw a different country than other people saw, he hasn't born in the country so he had the independent view on Americans. Interested about the tension in the gloss of American culture and wealth over race and class differences which gave a clear contrast to the other contemporary photojournalists.
On this image we can see bus or a tram, with open windows and through each window one person looking out. The composition is very interesting because the windows kind of split the image into individual parts, like portraits of each person. When I look on this photograph I think it is a very well composed image and also a good portraiture of the Americans in that time. Because the people look into the camera and not into the direction where the bus goes, makes the image more like a portrait than a street photograph. Bibliography: Robert Frank (1958). The Americans. France: Robert Delpire, Grove Press, Steidl. 180. The last photograph I will have a look at today is from my internet research and it is a portrait photograph which has been seen as a part of the Taylor Wessel portrait prize exhibition.
First what I see on the photograph is a portrait of a tired looking young woman. Then I looked into the photograph bit more and I discovered the mud patches and the dirt on her clothes and on her face. Her clothing refers for that she is a jockey. This portrait photograph is very well presented and shows a face of a tired jump jockey. The photographer is Spencer Murphy and the model is Katie Walsh, a famous and respected female jump jockey from England. The lighting is flat and the colours are not so vivid what give a bit more realistic feeling to the portrait. First I seen this photograph on the cover of BJP magazine a couple of months back. Later I did a little research on the photographer and the model and this is what I found.
Spencer Murphy for Katie Walsh
Spencer Murphy grew up in Kent and studied at the Kent Institute of Art and Design before gaining a BA in Photography at Falmouth College of Arts.
Taken at Kempton Park Racecourse his portrait of Katie Walsh was taken whilst shooting a series of jump jockeys' portraits for Channel Four's The Original Extreme Sport campaign. He says: 'I set up at the side of the racecourse and pulled in the jockeys as they finished their races. I was keen to include Katie, I wanted to show both her femininity and the toughness of spirit she requires to compete against the best riders in one of the most demanding disciplines in horse racing. I chose to shoot the series on large format film, to give the images a depth and timelessness that I think would have been hard to achieve on a digital camera'.
Shortlisted for the Sony World Photography Awards in both 2010 and 2011, Murphy's work will now have been exhibited as part of the Taylor Wessing Photographic Portrait Prize seven times, and last year his portrait of actor Mark Rylance won him Third Prize.
Low key photography is when the photographer use less lighting in the picture and creates a moody effect by the control of the contrast.
This image show with a one light source to create the low key effect. When I have a look at this image I see a lonely and obviously very sad person in a bat tube. The control of the light which enables a low tonal range creates a very moody sad picture. I would also think about this person is really considering the option of suicide or similar because she looks very unhappy. Looks like everything in her life what she owned and beloved suddenly just disappeared. Even the bath tube is dirty and a woman with a dirty bath tube in my opinion is not so common because women always like to clean everything so I am sure she wouldn't let her bath room look so dirty and unassuming. So she doesn't even care about anything anymore. That is my opinion and that's what I think of this image. It is a very depressing image thanks to the low light setup.
On this website you can see more works from this photographer.
High key photography is the opposite of low key. A bit more like happiness and creating more smoother images.
The photographer on this image used the technique very well. It is a black and white picture again but this picture is completely opposite to the image before I've shown. It is a very delightful image as it is a wedding picture it has to be happy. The high key also adds joyful feeling to the atmosphere. The details are blown out the image I would call more "smooth" and easy to see, thanks to the technique. It gives the feeling that the couple on the image are very very happy obviously it is one of their happiest moment in their life. The image composed heavenly how the couple steps out of the light and all eyes on them seems to be a happy couple. With this method in photography is easy to create this kind of happy image. Often used in portraits or fashion photography and goes well with wedding.