Tuesday, 22 October 2013

Unit 1 mini brief

Unit 1 mini brief

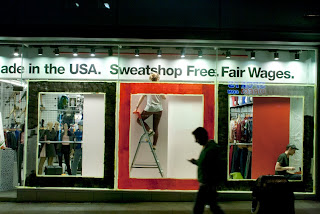
Our task was to show what have we learnet in the past month. What camera skills and photoshop skills we have been introduced to. I`d like to show my 5 sequence photos I took at night. The subject or theme would be the lights. How busy, colorful and bright our town is.


First I used wide angle lens to take this shot. Used a slow aperture value to show some movement with the guy in front. Gives a bit of life to the picture. ISO was high due to a night shot so the picture would be a bit noisy. I have editd in photoshop the resolution. I ve changed it to 72 ppi so it is easy to upload to my blog.


Next picture was taken outside of Britannia hotel. I took this shot to demonstrate the shallow depth of field. I ve focused on the taxi sign and left everything out of focus by using a very low aperture such as 1.8. So the depth of field is short because of this. Iso was set for about 400. 1/60th of a second. There was not a lot of movement so wouldnt need a fast shutter speed.

.
Next picture was taken on Deansgate. While the cars were quieing front of this big blue lit building. I have outfocused so everything got blurred and used a slow shutter speed so you can see the movement of the camera. 18mm @ 400ISO


On my way home took this picture with the same technique as above. 18mm @ 800 ISO that`s why the picture is so noisy.


The corn exchange shot at 1/30th of a second ISO 400 and 18mm wide.
Tuesday, 8 October 2013

Photoshop layers /multilayering


Today we have a look at the layers, how to work with multilayering technique in photoshop.


The first thing is to pick the images what we want to blend into each picture to work with them.


The first thing I did was to modify the images. Started with the levels to create a darker image.
 Darken the blacks in the curves mode.
 Used black and white to create a more moody picture.
Selected with the ecliptic tool and inverted the selection in the select menu. I did that to darken the edges
Adjust the feather higher.
Once it is done just flatten the image. Select the move tool by pressing V. Grab this image to copy on the main image.

Now we use the previous image as a layer. Pressing the ctrl+T you can adjust the size of your layer. Don't forget to press the little chain icon to keep the measures.
Applying the layer mask and using the brush tool by pressing B. I've changed my brush to create a dry brush effect. Just brushed around the stones with a low opacity. After all just changed the screen mode of the layer for 'screen'.


 Added another layer with the same technique before.

Change the screen mode of the layer to overlay or screen.

And here is the final image with the layers blent into each other with a bit of brushing.

Monday, 7 October 2013

Depth of field (aperture)

.
Depth of field

Today we have a look at depth of field, how to use the f value. The f value on the lens of a camera is to show the amount of light what the aperture will let in to hit the sensor or film. The lowest number like 1.8 or 1.2 means the aperture is wide open and it let a lot of light in. Good for low light situation. It will also affect the depth of filed. So the d-o-f will be short (background blurred).


The last two images has been taken with a higher aperture. So the details in the background can be seen. The dept of field is longer than on the previous images.


I have edited them pictures in photoshop and just saved it with lower resolution.


Shutter speeds

Today we have a look at 3 different shutter speeds. A very slow to a faster shutter speed. I took 3 pictures to demonstrate. I also took some screenshots to show the editing process.

First picture was taken with 1/8th of a second.
You can see the bus was moving faster than the shutter speed but the people in the bus stop they didn't move at all.
I took this picture in raw mode so when I edited with photoshop.
I had to do the settings. I added a bit of temperature for the color.
Changed the levels a bit. Changed the blacks for 15. Left everything else as it was.
I've changed the curves  so lighten the black a little bit.
The last thing I've done was flatten the image and saved with 72pixels resolution as a jpeg.
The next picture was taken on 1/30th of a second. So the cyclist was still faster thats why the movement not frozen properly.
Shot in raw again. Modified the temperature and a bit of exposure.
Changed the levels.
I changed the blacks on the curves and also changed the reds. Lighten the reds a bit.
Flatten the image and saved with 72 pixels.

The last photo was shot on 1/250th of a second. It was enough to freeze the action. 


Blur: The last picture I took is to show the panning technique. Slow shutter speed and follow the object with your camera. It will blur the background but the object will be sharper.
I took the picture with 1/8th of a second and just followed the car. Background blurred.

In raw I changed the clarity and the exposure. After that changed the curves as you can see on the screenshots.


Open flash:

I took this picture with flash and slow shutter speed while I was moving the camera. And also I 've set up the camera to flash on the 2nd curtain so the flash goes off before the shutter closes.